
Archive
Dressing the Mannequin
Posted 12/31/20 (Thu)
Padding Hips, Chopping Feet and Other Lesser-known Exhibit Alterations
By Lori Nohner, assistant curator of collections management
One part of creating an exhibit that people rarely think about is mannequin dressing. Let’s shed light on why it takes so long to create an exhibit including so many mannequins.
Wouldn’t it be nice if we could just slip an outfit on a dress form (a mannequin without a head, arms, and legs) and call it good? That would make exhibit preparation so much quicker. But out of 140 outfits used in this exhibit, I can count on one hand the number of forms that didn’t need some sort of modification. (Former North Dakota first lady Grace Link, I love you and your dress.) A good mannequin dresser never makes the garment fit the form. It’s always the other way around. Modifications may include building out the forms by padding out waistlines and hips, or even adding arms and legs. Alternately some forms need to be reduced, which requires chopping off specific body parts. The desired result of all this work is to make historic garments appear their best, while protecting and supporting them throughout the exhibit.
Let’s take a look at one example. Catherine Tschida Patterson of Sims wore this cotton and lace dress to her graduation in 1912. (Click here to learn more about this cool dress.)
Step 1: First, we try the garment on the form to get a sense of what needs to be done. In this case Catherine’s dress looked pretty empty and needed padding at the bust and hips, as well as arms.
![]()
Just an “empty” graduation dress. SHSND 1988.230.2
Step 2: I layered on polyester quilt batting to areas that needed padding. Polyester batting is scratchy, so we added a layer of cotton stockinette tubing to protect the garment. This also helps hold the batting in place. Then the dress goes back on to see if it looks right. Sometimes I need to repeat this step two or three times before I get the padding situated correctly.
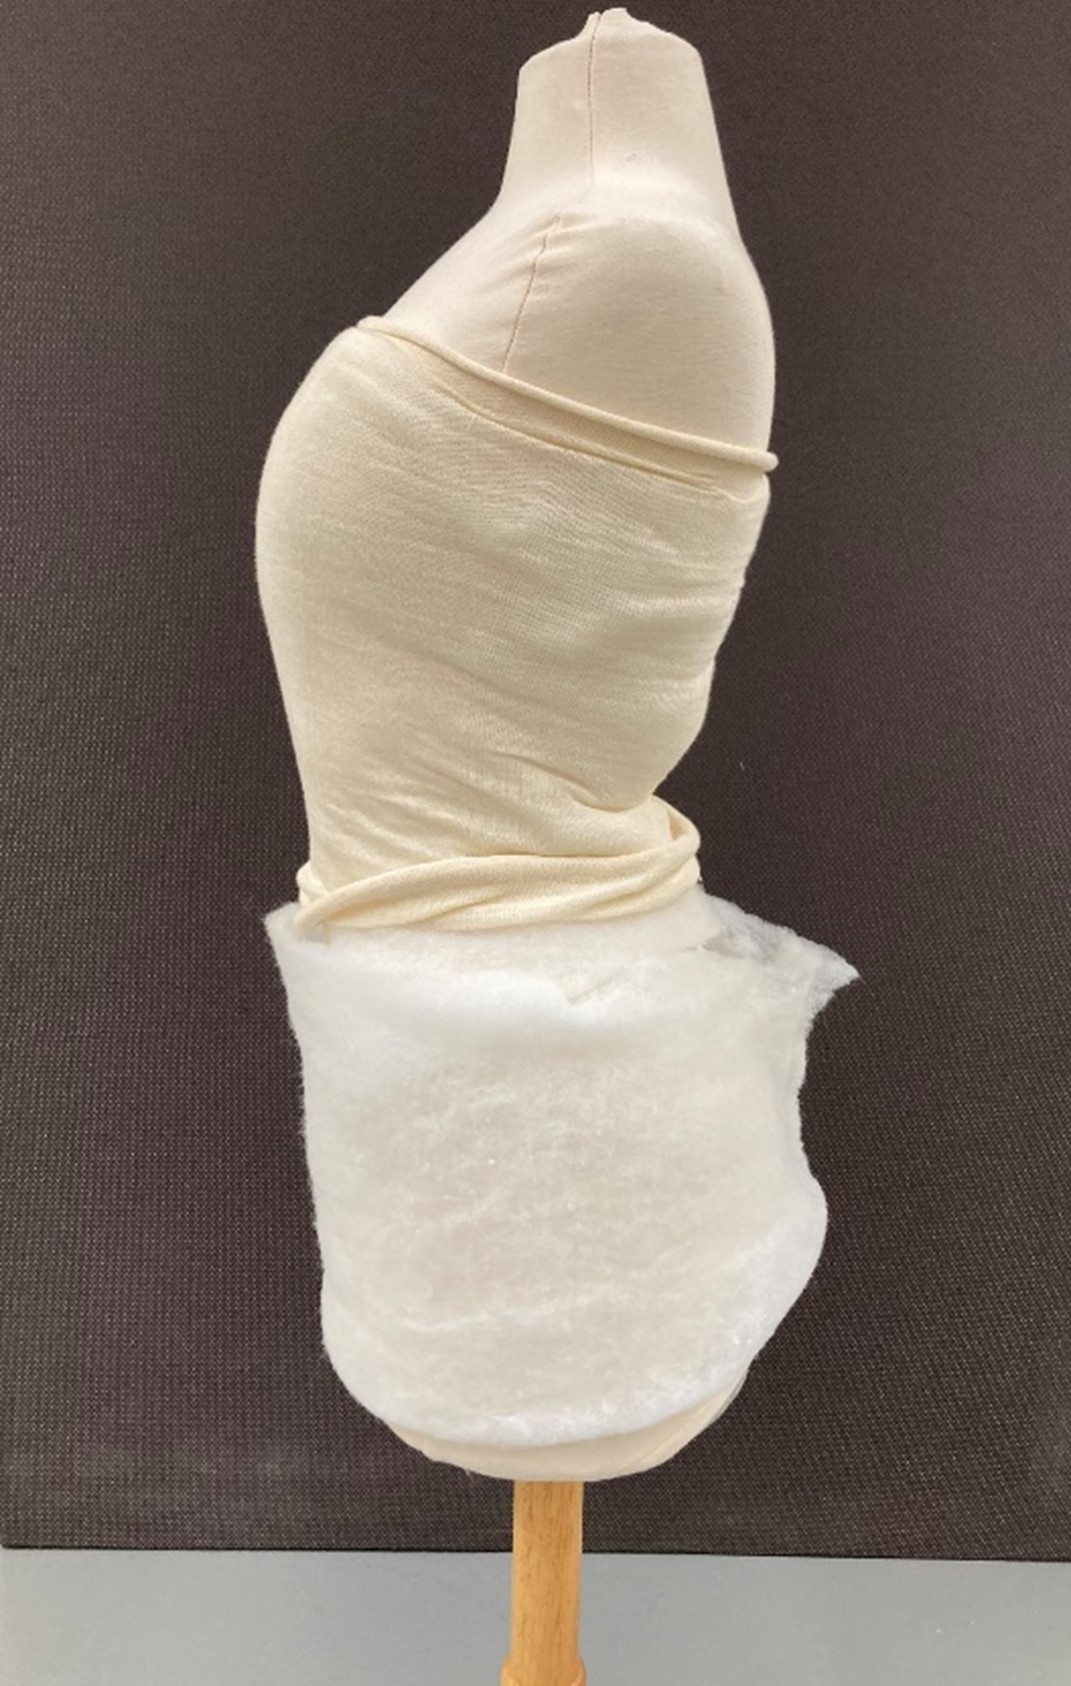
I used polyester batting to fill out the bust and hips.
The top half of the form has also been covered with stockinette.
Step 3: The next step involved adding arms and a linen neckline cover. Because Catherine’s dress is a light, cotton lingerie-style dress typical of the early 1900s, it also needed a slip. Curator of Collections Management Jenny Yearous sewed a white cotton slip to protect Catherine’s modesty.
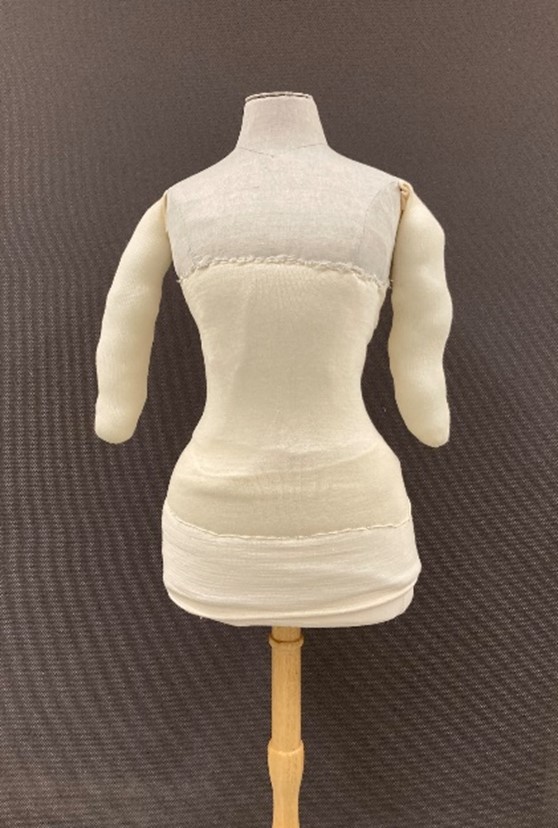
“Armed” and ready for dressing.
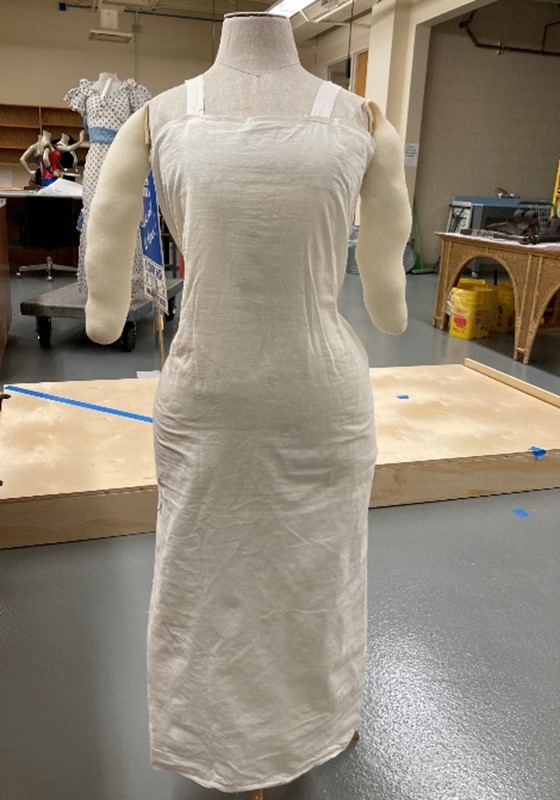
Underwear is important.
Step 4: The final dressing. The finished product is a more lifelike shape consistent with typical women’s fashion during the 1910s. Most people won’t notice the form underneath the garments. But the work that goes into the form helps each item of clothing look its best.
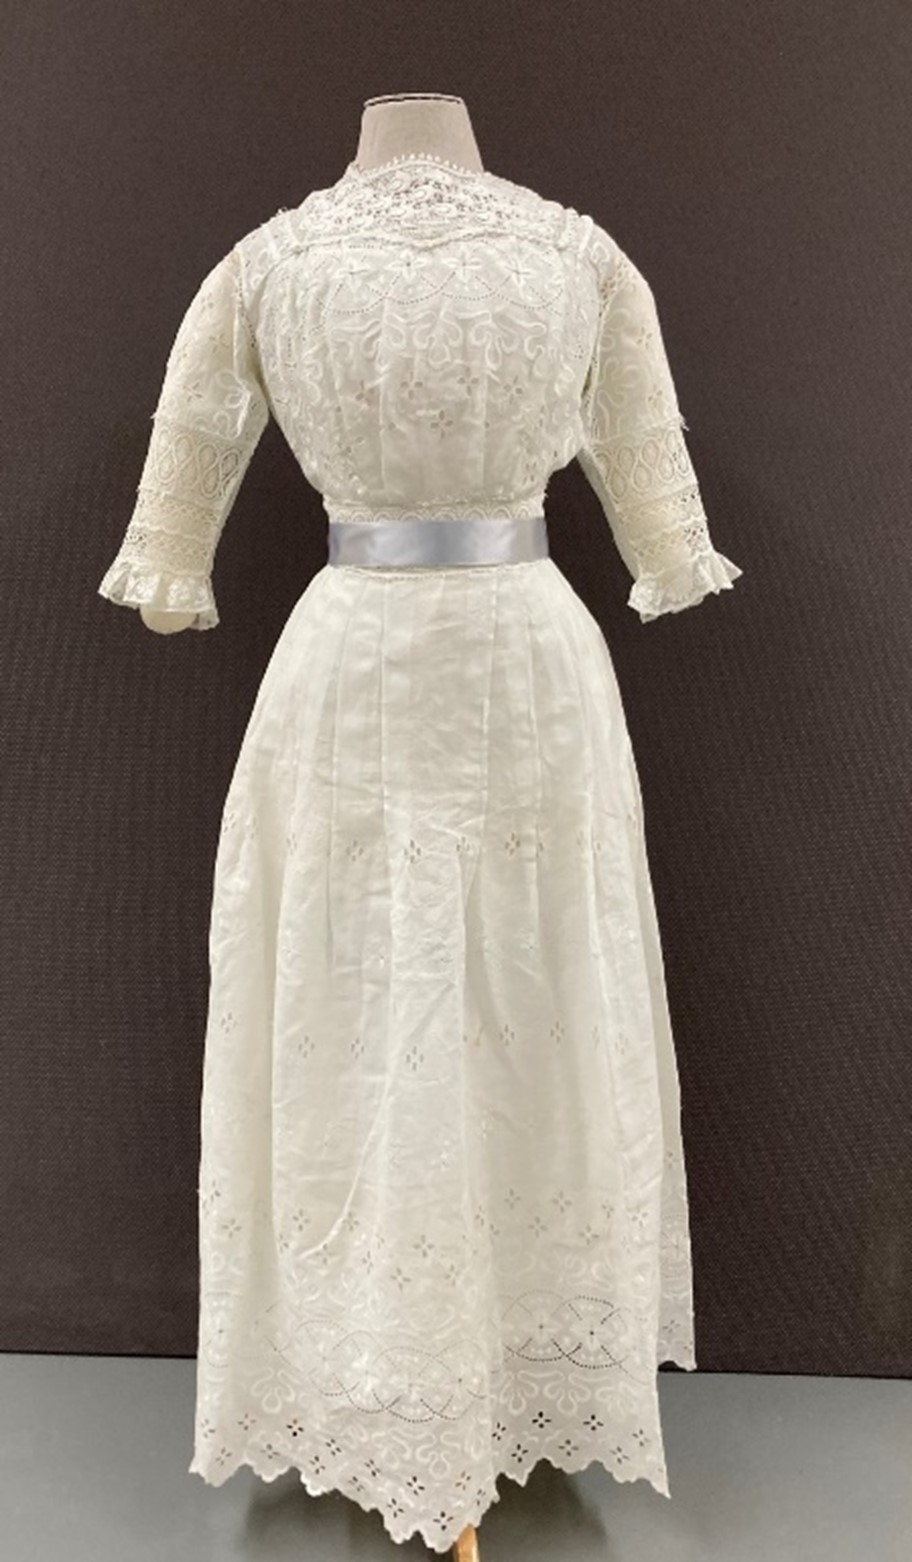
Catherine Tschida Patterson’s dress is now ready for exhibit. SHSND 1988.230.2
Other types of modifications used during exhibit preparation include carving down forms or removing body parts altogether. We have assessed each garment, considered how to best protect and preserve their fabrics, and shaped each of the 140 forms to best fit those needs for preservation.
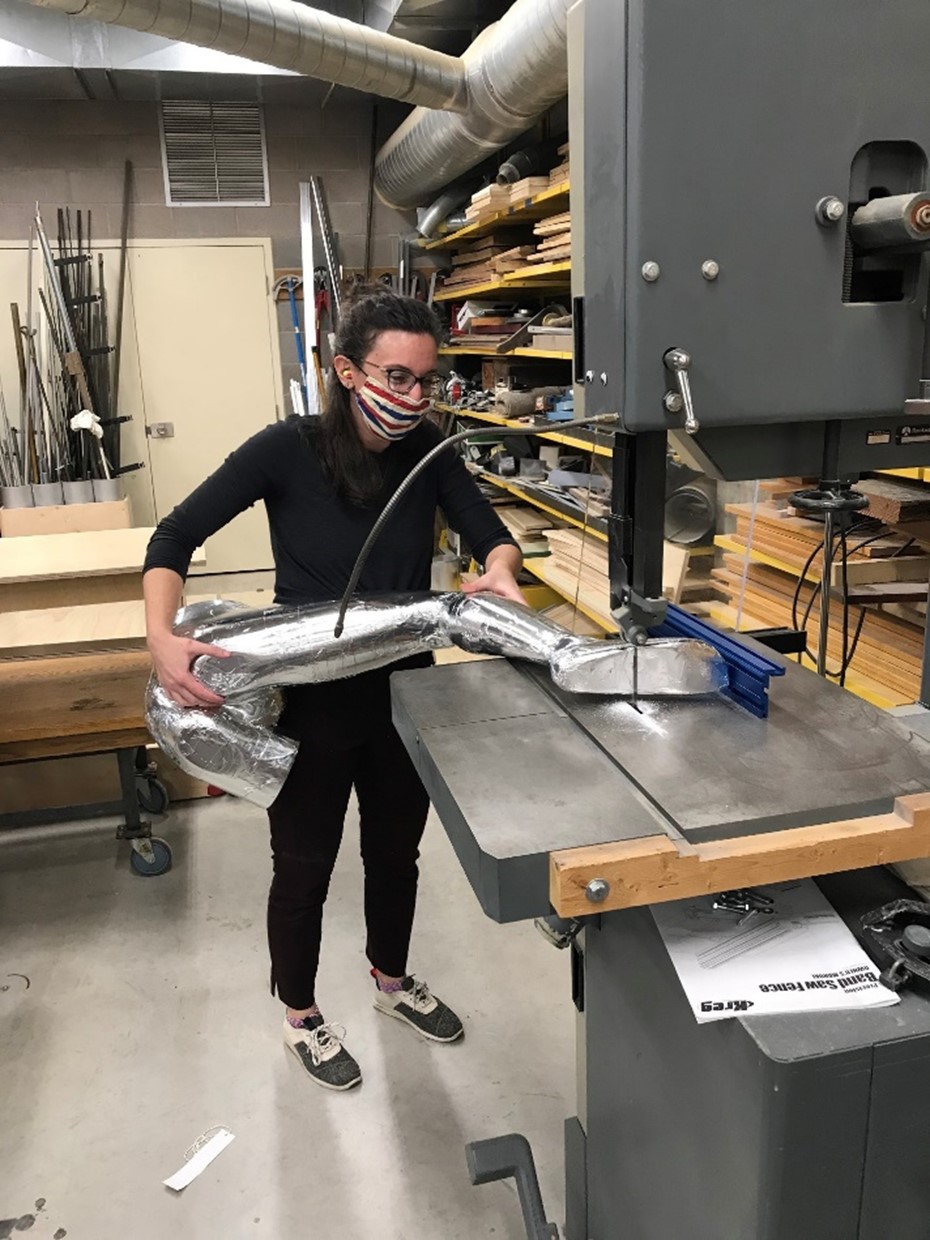
Here I am chopping off feet so boots can fit, a little something I call
“Cinderella,” the twisted, non-Disney version.
Meanwhile, other staff are working hard on the many additional pieces of the exhibit puzzle. I’ll leave you with a list of some other parts of the exhibit-making process you may not have thought about:
- Researching and writing exhibit text
- Writing object labels
- Editing exhibit text and object labels
- Graphic design of approved exhibit text and object labels to make them visually appealing and easy to read
- Graphic design of all photographic images in the exhibit
- Video production and editing
- Working with lenders for items loaned specifically for this exhibit
- Design of exhibit floor plan and layout
- Fabrication of the exhibit floor plan and layout
- Fabrication of exhibit furniture (risers, boxes, etc.) and special object mount
If you have items or clothing to be considered as donations to the State Historical Society, go to online donation form, or for more information, contact Melissa at methompson@nd.gov or Elise at edukart@nd.gov.
Next article:
Previous articles:
Once a Bennie, Always a Bennie
Upcoming Fashion & Function Exhibit Highlights Objects from the Jewish Faith
Hats and Hunting: Fashion and Feathers in Our Museum Collection
Western Symbols Tell Stories of Cattle Culture
Red Berry Woman, Red Berry Style
Spooktacular Fashion: Four Vintage Halloween Masks
Wouldn't It Be Wunnerful, Wunnerful
An Army of Aluminum Mannequins Takes Shape
Miss America’s Gown & Wonder Woman Boots Have Arrived!
Fashion & Function: North Dakota Style